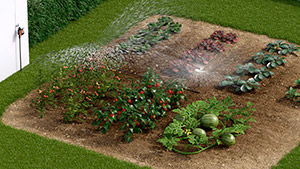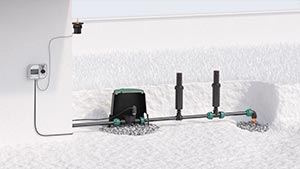
All lines
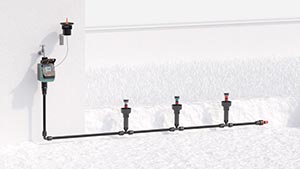
Above-ground
Drip irrigation

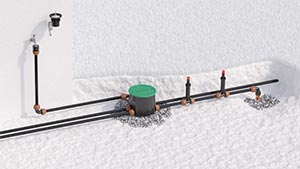
Underground
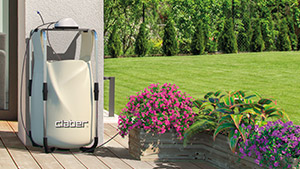
Online catalogue
Oasis Evolution must be installed in closed environments, protected from atmospheric agents and poor weather conditions. To prevent the water in the internal tank from overheating, position Oasis Evolution in a shaded and cool area, away from windows or glass partitions and in any case, away from direct sunlight.
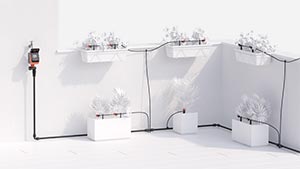
Once the installation position has been selected, lift Oasis Evolution holding it at the bottom with both hands and place it on a unit or a shelf, at a height of approximately 100-110 cm from the ground: the unit or the shelf must be stable, level and be able to support the weight of Oasis Evolution when full of water (approximately 27 kg). Also, make sure that Oasis Evolution is at least 70-80 cm from the edge of the tallest pot.
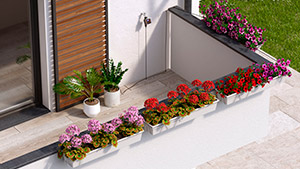
Position the plant pots on the floor in a semicircle near the unit where Oasis Evolution is positioned.
Remember to place a pot saucer below the plants to collect any excess water.
Plant the plastic stakes provided in the soil: each stake will correspond to a dripper(the maximum number of drippers that can be used with Oasis Evolution is 20 and the minimum is 1. The hose can be extended up to 20 metres). Generally speaking, for small and medium sized pots, one dripper is sufficient. For larger pots, two drippers are recommended. If you change the number of drippers, the quantity of water distributed by each dripper does not change; the number of days the system operates autonomously changes.
NOTE: the drippers are not adjustable.
Oasis Evolution needs two new LR6 alkaline 1.5V batteries that have never been used, with an expiry date exceeding one year.
Act on the keys on the sides of the front panel until you hear it engage.
If present, remove the flat batteries. Connect the new batteries to the connector respecting the polarity.
Lift up the front panel and reposition it.
For optimal operation, it is recommended that the batteries are replaced at least once a year. Before using Oasis Evolution, check the battery charge by turning the dial to any programme and checking the display. If the display lights up, the batteries are charged; if the display remains off, the batteries are flat and need replacing.
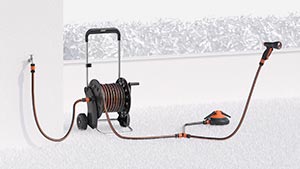
In order to ensure that Oasis Evolution operates correctly, the two lengths of hose leading from the tank panel must be long enough to touch the floor before they are connected to the drippers in the first pots: this simple precaution is necessary to make sure that watering starts correctly.
Unroll the hose laying it out in a ring. Make sure that it does not create a hazard or obstruct people or animals. Once all the pots have been connected, bring the hose back to the second connector in the front panel of Oasis Evolution (if necessary, cut off the excess hose using scissors).
Cut the distribution hose approximately 2 cm from the stake.
Connect a dripper by pressing the hose firmly onto each end: make sure that the dripper outlet is facing downwards. Use the same procedure for all the other stakes, until all the drippers required have been fitted. You have now created the circuit which will distribute the water to the pots, complete with drippers.
Check that the dial is set to OFF. Fill the tank with 25 litres of clean water. Any liquid or granular fertilisers are to be added directly to the soil in the pots. Do not under any circumstances put them into the water in the tank.
Close the cover before activating Oasis Evolution.
Oasis Evolution has 5 programmes (4+OFF), specially designed to allow independent operation for 7, 14, 21 or 28 days autonomy which can be selected using the programming selector switch on the front. The display switches on with the first click of the dial.
Always remember to press START to confirm your choice (including for OFF). If the chosen programme is not confirmed by pressing START, after a few seconds it returns to the programme previously set.
NOTE: Oasis Evolution irrigates once a day only.
To select the required program, set the programming selector switch from OFF to the required position: 7, 14, 21 or 28 days and press START. Oasis Evolution is now in operation, automatically controlled by the electronic timer.
Regardless of the water level in the tank, Oasis Evolution will deliver the same amount of water to your pots each day (see table), throughout the programmed period, thanks to a special internal device which automatically regulates the water pressure. As can be seen in the table, the time and water dispensing change according to the program selected.
After the first start, subsequent irrigation cycles will run every 24 hours on the remaining days.
To select the desired program, turn the dial from OFF to the desired position: 7, 14, 21 or 28 days, and press START.
Press the START button again, as many times as the number of hours you wish to delay the start time by. The maximum delay that can be set is 23 hours.
The amount of time remaining before the irrigation cycle will start is shown on the screen. Once the cycle has started, the time remaining until the end of the cycle is shown.
At the end of the cycle, the time until the next irrigation cycle is shown.
If Oasis Evolution is not used for a certain period of time, switch it to OFF mode by turning the dial on the front panel and pressing START. When the device is in this mode, it will not dispense water. Remember to reactivate programming the first time you use it again.
For your Oasis Evolution to operate correctly, you must expel all the air from inside the circuit.
Set up the system and switch on your Oasis Evolution with your preferred program.
Disconnect the hose connected to the dripper halfway along the loop circuit, put your finger over one end to seal it, and wait for water to flow from the free end.
Now put a finger over the end of the hose from which water is flowing, and at the same time remove your finger from the other end of the circuit allowing the water to flow.
At this point, reconnect the hose to the dripper and restore the loop circuit.
The filter must only be removed and refitted when the tank is empty.
Before each use check the state of the filter and eliminate any impurities from the water which may have been caught by the mesh.
If necessary, remove the filter and rinse under running water.
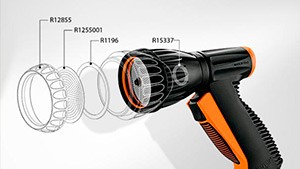
The drippers can be cleaned and inspected to allow them to be cleaned inside if necessary: to do this, separate the two pieces which make up the dripper and rinse them under running water.
When no longer in use: set the programming selector switch to OFF.
Disconnect both ends of the hose from their connectors, blow into the hose to drive all the water out and into a container.
Remove the cover and lift Oasis Evolution from the bottom using both hands.
Then empty into a sink.
Check the state of the filter and eliminate any impurities from the water which may have been caught by the mesh.
Remove the batteries.
Use a soft cloth to dry the inside and outside of the tank.
Store Oasis Evolution with the cover fitted in a closed environment where the temperature does not fall below 3 °C.
Do not disconnect the drippers from the hose: this avoids the risk of pieces being lost, and the distribution circuit will be ready the next time it is needed. Remove any remaining soil from the stakes. For convenient storage, all the parts can be placed inside the empty tank.