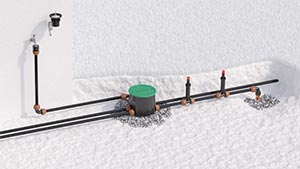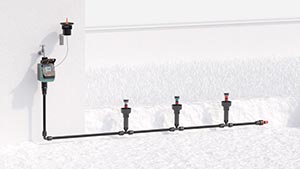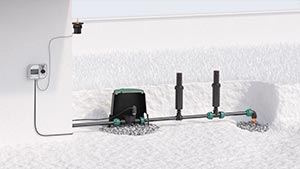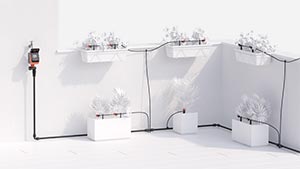
All lines
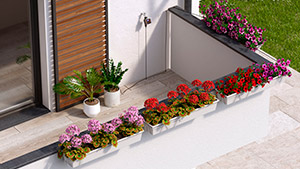
Above-ground
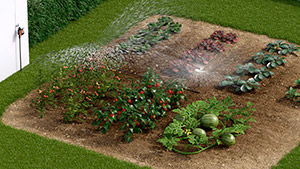
Drip irrigation

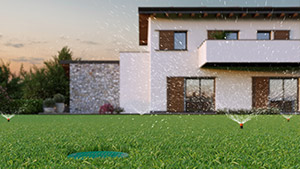
Underground

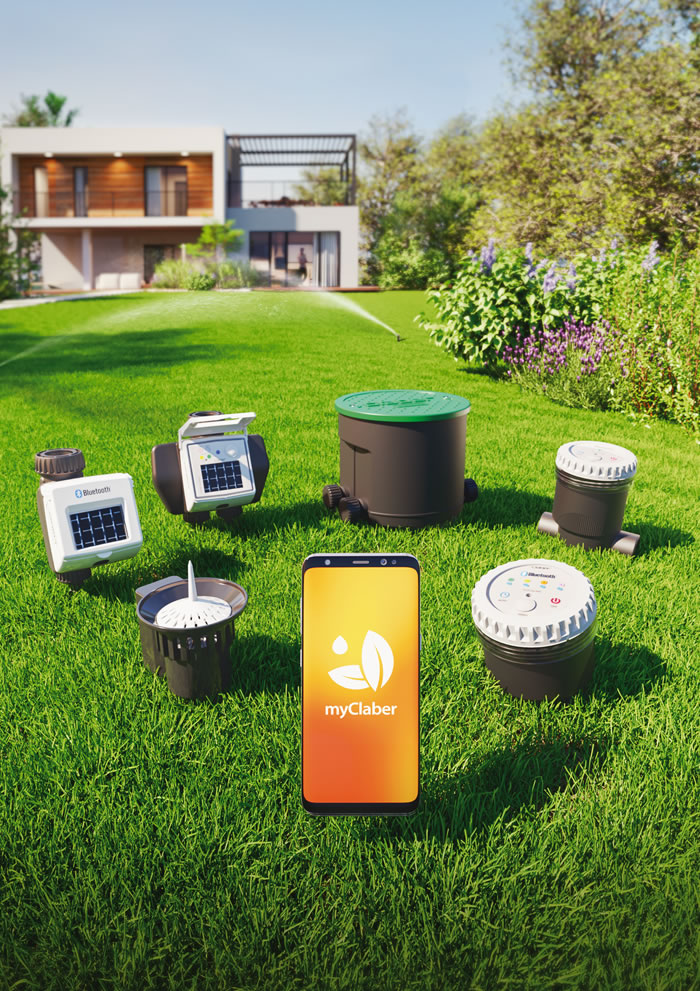
Online catalogue
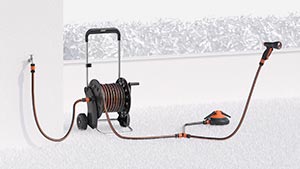
Fit the timer to a cold water tap. The spout of the tap should have a 3/4" male thread (if not, use an adaptor). Screw the clamp collar of the 3/4" female fitting onto the tap. Caution: tighten the collar using hand pressure only. Do not use wrenches or other tools. Connect the watering lines to the respective quick-click or threaded fittings, using the appropriate connectors.
Do not install the water timer inside valve boxes, below ground level or indoors. Use mains water or have the water filtered. Do not use the water timer with chemicals or liquids other than water. Do not use the water timer with operating pressures lower than 0.5 bar (7.3 psi) or higher than 10 bar (145 psi). Remember to open the tap and close the timer cover.
Connect the timer to the tap.
Connect the hose on the watering line.
To insert or replace the batteries, press the lower button down fully and, at the same time, release the front of the timer.
Use 2 new, branded 1.5V type AA (LR6) alkaline batteries with an expiry date more than a year away. Insert them into the relevant compartment, respecting the polarity. Replace the batteries within 2 hours of removing them, otherwise programming will be lost.
Refit the front part of the timer to the back and press, ensuring that the locking tab clicks into place.
Important: always replace the batteries at the beginning of each season!
When the batteries are completely flat, the control unit automatically stops its functions and closes the valves. Never replace the batteries during irrigation, otherwise the water will continue to flow at the end of the cycle.
The timer is provided with two lines, A and B, that can be programmed independently.
Press any button once to light up the display and proceed with setting the programme.
Press button P one or more times until the programme you need appears on display C (e.g. 3 = 1 minute every 12 hours): display D will show the run time (how many minutes to water for); display E will show the frequency (how often to water).
Both the run times and the frequencies are pre-set and cannot be changed.
Warning: if the programming entered is set up for the two lines to water at the same time, in order to ensure an adequate flow rate to the system the timer will automatically stagger the time one line opens.
Immediate start. Within 10 seconds of selecting the programme, press the A-START button (start irrigation on line A) or B-START button (start irrigation on line B) just once. Releasing the button, the message "0 h" blinks 3 times in the display, and automatic irrigation for the selected line will start immediately.
The watering-can symbol appears in display field "C", indicating that watering is in progress, together with the time remaining until the end of the cycle, and the symbol A or B showing which line is active.
At the end of the watering cycle, display field “C” shows: the symbol A or B, to indicate which watering line will be activated next and the time remaining until the start of the next watering cycle, displayed above the hourglass symbol. On display D - E you will see the irrigation run time and frequency respectively.
Delayed start. Within 10 seconds of choosing the programme, press the A-START or B-START button several times to programme line A or line B, until the desired delayed start time for the irrigation cycle is shown on display C. This can be set to between a minimum of 1 hour and a maximum of 23 hours.
Release the button, and the number of hours will blink 3 times, after which the programme begins the countdown to the automatic start of the watering cycle, shown in display field “C” above the hourglass symbol. If you want to view the programme set, press the button corresponding to line A or B.
Repeat the programming procedure as indicated in the “Selecting a programme” section. The new programme set in this way will replace the previous one. The line does not have to be turned to OFF beforehand.
If, in the waiting time between one irrigation session and the next, you want to carry out a supplementary session, you can start manual irrigation for 5 minutes. Press the “A-START” and “B-START” buttons simultaneously and hold them for at least 3 seconds; the timer goes into manual mode.
To open line A or line B, press the corresponding button: an irrigation session with a run time of 5 minutes that cannot be changed will start.
The run time of a manual irrigation session cannot be increased, but its end can be brought forward manually by pressing the A-START or B-START button.
To exit the manual function, make sure that the valves are OFF and then press the A-START and B-START buttons at the same time and hold for at least 3 seconds.
The timer’s factory settings can be restored at any time by pressing the A-START and B-START buttons at the same time and holding for at least 10 seconds, until all the segments appear on the display.
To stop an irrigation session, press button P until OFF appears.
Then press button A-START or B-START, depending on the line you want to intervene on. The programme will have to be reset.
The timer can be connected to a Rain Sensor, by wire (cod. 90915) or by radio (cod. 90831). When the rainwater in the Rain Sensor exceeds 5 mm, the sensor automatically suspends the irrigation cycle, which then restarts once the water has evaporated.
Remove the protective jumper from the rain sensor contacts (no tools are needed). If the Rain Sensor is not used, the jumper must remain inserted, otherwise the timer will only run manual irrigation programmes and not any automatic irrigation programmes.
Fit the connector of the sensor lead.
Check that the two-core cable enters the timer by way of the slot provided in the rear of the housing.
Remove the protective jumper from the rain sensor contacts (no tools are needed). If the Rain Sensor is not used, the jumper must remain inserted, otherwise the timer will only run manual irrigation programmes and not any automatic irrigation programmes.
Install the RF Rain Sensor Interface (cod. 8480), routing the wire antenna through the relative clips.
Clean the filter at the end of each season and check it regularly.
Turn off the water tap. Loosen the 3/4" screw collar of the tap connector, turning clockwise.
Remove the filter.
Rinse the filter clean under running water. After washing, reassemble all parts as before.
At the end of the season, before the winter frosts, disconnect the timer from the tap.
Remove the batteries
Store the timer in a sheltered place, away from damp, where the temperature does not fall below 3°C.