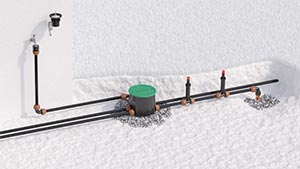
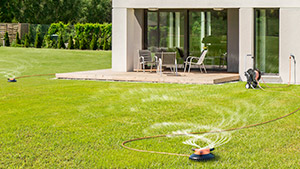
All lines
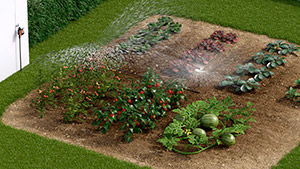
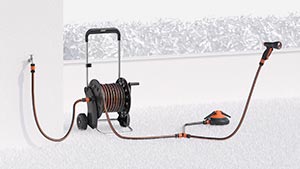
Above-ground

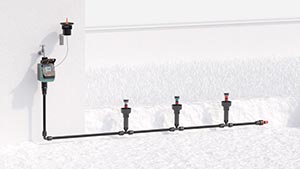
Drip irrigation

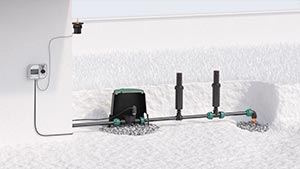
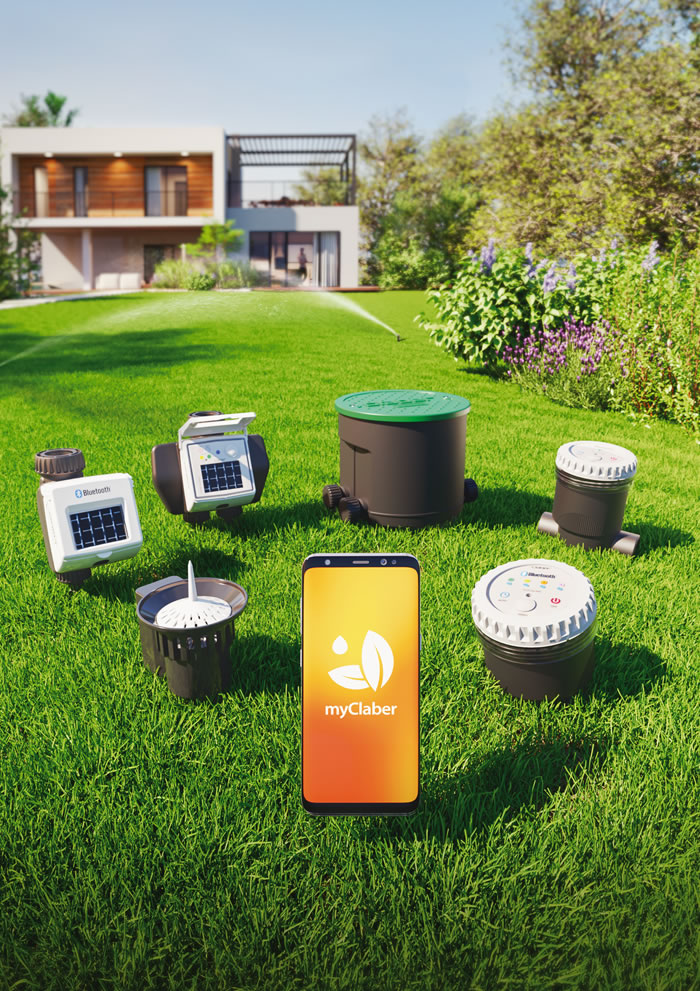
Underground

Online catalogue
Install the water timer outside, in a bright area, avoiding any areas which are in shade or dark.
Install the water timer outside, in a bright area, avoiding any areas which are in shade or dark.
Fit the timer to a cold water tap. The spout of the tap should have a 3/4" male thread (if not, use an adaptor). Screw the clamp collar of the 3/4" female fitting onto the tap. Caution: tighten the collar using hand pressure only. Do not use wrenches or other tools. Connect the watering lines to the respective quick-click or threaded fittings, using the appropriate connectors.
Do not install the water timer inside valve boxes, below ground level or indoors. Use mains water or have the water filtered. Do not use the water timer with chemicals or liquids other than water. Do not use the water timer with operating pressures lower than 0.5 bar (7.3 psi) or higher than 10 bar (145 psi). Remember to open the tap and close the timer cover.
Connect the timer to the tap.
Connect the hose on the watering line.
The timer uses mainly light as energy to operate. For the backlit display to switch on or when there is insufficient light (e.g. after a few days of rain), the backup AA 1.5V (LR6) branded alkaline battery (not included) is used automatically to ensure the timer works correctly. The battery has to be inserted, even when it is sunny.
The “sun” symbol on the display:
- if this symbol flashes, it indicates there is not enough light (therefore the water timer will be battery operated)
- if this symbol remains active, it indicates that there is sufficient light (therefore the water timer will operate on solar energy).
If the battery used is new and the water timer is installed correctly, he life cycle of the battery will be approximately 4 years (or until the expiry date if this is less than 4 years). The life cycle of the battery therefore depends on:
- environmental conditions (number of sunny/rainy days);
- where the water timer is installed;
- how often the backlit function is used.
The water timer is protected against reverse polarity of the battery and automatically checks the battery level.
When the battery is flat:
- if any key is pressed (for example, display back lighting), programming is suspended. To restore programming, replace the battery;
- if NO key is pressed, programming is in any case carried out (only if there is enough sunlight (“sun” symbol permanently activated).
To insert or replace the batteries, press the lower button down fully and, at the same time, release the front of the timer.
Remove the flat batteries, if in place. Fit the new battery in the support observing the correct polarity.
If the battery is removed or runs flat, the programmes and watering days are saved. You will need to enter the date and time again.
Refit the water timer by joining the two parts until you hear the "click" of the coupling of the side key.
1) Rain Sensor rain indicator full;
2) Power source indicator;
3) Rain Sensor/ timer battery indicators;
4A) PLUS mode on: watering cycles start up on odd days (1) or on even days (2). If PLUS is off no numbers appear;
4B) Giorni della settimana in cui partono le irrigazioni;
5) Information about time, run time, start time of next watering cycle (if watering is in progress, only the flashing symbol of the watering can and the minutes remaining appear);
6A) PLUS mode on with indication of current day, even (2) or odd (1);
6B) Current day (flashing);
7) Current time;
8) p.m. - a.m. (time in English language format).
The days are shown as: S Sunday, M Monday, T Tuesday, W Wednesday, T Thursday, F Friday, S Saturday.
9) Total run time of all watering cycles for the week;
10) Programme start time;
11) Programme run time;
12) Programme number;
13) Days on which programme starts up (1 or 2 is shown if the PLUS function is on).
The days are shown as: S Sunday, M Monday, T Tuesday, W Wednesday, T Thursday, F Friday, S Saturday.
Press any key to access the backlit display.
Press and hold the arrow keys at the same time until the message set appears on the display followed by the flashing message 24h.
12-hour or 24-hour clock option. Press the - button to choose whether to set the clock to 12-hour or 24-hour format.
If the 12-hour clock is selected, the current time will be displayed or, if in programming mode, the letter A (a.m.) or P (p.m.) will appear to indicate the correct time.
Example: A 4:00=4 at night (4:00) / P 4:00=4 in the afternoon (16:00).
HOUR setting. Press the right arrow key to access the HOUR setting (the number flashes to indicate that a value needs to be entered). Press the + and - keys to set the value (in the example, 18:00).
MINUTE setting. Press the right arrow key to access the MINUTE setting (the number flashes to indicate that a value needs to be entered). Press the + and - keys to set the value (n the example, 35 minutes).
DATE setting. Press the right arrow key to access the DATE, if you have chosen the 24-hour clock, the values will be displayed in the format day-month-year; if you have chosen the 12-hour clock, the values will be displayed in the format month-day-year.
These values are set in same way as described for the HOUR and MINUTES.
The water timer has an internal calendar so once the date has been set, the day of the week (for example, Monday) is recognised automatically.
Setting the PLUS function. During programming, use the PLUS function to set:
- the days of the week on which you want to irrigate (OFF);
- evend days (On 1 - Monday, Wednesday, Friday);
- odd days (On 2 - Sunday, Tuesday, Thursday, Saturday).
To access the PLUS function setting, press the right arrow key after having set the date. Repeatedly press + to set the parameter to OFF, On 1 or On 2.
Press the right arrow key to go back to the TIME page.
Press any key to access the backlit display. Press the button shown to scroll through the programming pages for the 4 available programmes until the number of the programme you want to set shows in the bottom right corner (e.g. Pr 1).
Use the + and - buttons to enter the start time (e.g. 6:00). As the default setting, the time is always set to OFF (watering is NOT active): leave this if you do not intend to use the programme. The start times must be set within the 24-hour day.
After having set the start time, press the right arrow key to access the RUN TIME setting for the watering programme. The timer automatically sets a run time of 10 minutes which can be changed from a minimum of 5 seconds to a maximum of 90 minutes. Press the + and - keys to set the required run time (e.g. 20 minutes). If you press and hold the key it will move forward more quickly.
Pressing the left arrow key at any time takes the user back to the previous parameter setting (in this case the start times), if for example these need to be changed.
The programming mode is the same for all 4 programmes.
Warning: programmes cannot overlap; the timer will automatically stagger the times.
N.B.: during normal operation of the water timer, if the watering-can symbol is flashing, this indicates that watering is in progress.
Press the right arrow button to access the irrigation day settings.
If the PLUS function is ON, the timer automatically sets the watering cycle for even days (ON 2) or odd days (ON 1). If the PLUS function is OFF, set the days of the week you want each programme to run.
The days are shown as: S Sunday, M Monday, T Tuesday, W Wednesday, T Thursday, F Friday, S Saturday.
Each programme can be associated with different days. During the setting phase, the programme number appears in the bottom right.
Press the right arrow key to move from one day to another.
To deactivate a day (empty box) or activate it (box with the day), press + key. In the example, programme 1 will be carried out from Monday (M) to Friday (F). Press the button shown to save the values entered for Pr 1.
Set all subsequent programmes in the same way. The top display shows the total of all the watering RUN TIMES for the programmes set for the week (e.g. 4 hour and 40 minutes).
From the page with backlit display active and once all the required programmes have been set, it is possible to display the settings of each programme (the programme number appears in the bottom right) and change them if necessary (as indicated in the previous pages).
Warning: if you remove the battery, the watering programmes are saved. You will need to enter the date and time again.
Time page. After programming, the display goes back to the time page. On the time page, at the bottom of the display, you can see the start time, run time of the next programmed irrigation cycle (in the example: 10 pm for 30 minutes) and the irrigation days.
Watering in progress page. When programmed watering starts (for example, at 22:00), the display shows: the current day and time at the top, the remaining minutes at the bottom, the flashing watering-can symbol. When watering has finished, the time page will once again appear on the display.
Press any key to access the backlit display. Press and hold the button shown until the screen in the figure is displayed.
Press the keys + or - to set the required run time. Manual operation automatically suggests 15 minutes, which can be changed to between 5 seconds and 90 minutes (in the example, 20 minutes ). If you press and hold the key it will move forward more quickly. Press the right arrow key to start manual watering after a few moments.
To interrupt manual watering early, turn the timer to OFF (left arrow) and press the button shown for 3 seconds.
This additional watering does not affect the programming which has already been set.
To delete a programme, simply set the start time to OFF (watering NOT active).
To reset the settings, press the arrow keys for at least 10 seconds. The message SET will appear, then 24h and finally all the symbols will activate. At this point the two keys can be released and the reset has been carried out and you will need to set the timer again.
The timer can be connected to a Rain Sensor, by wire (cod. 90915) or by radio (cod. 90831). When the rainwater in the Rain Sensor exceeds 5 mm, the sensor automatically suspends the irrigation cycle, which then restarts once the water has evaporated.
Remove the protective jumper from the rain sensor contacts (no tools are needed). If the Rain Sensor is not used, the jumper must remain inserted, otherwise the timer will only run manual irrigation programmes and not any automatic irrigation programmes.
Fit the connector of the sensor lead.
Check that the two-core cable enters the timer by way of the slot provided in the rear of the housing.
Remove the protective jumper from the rain sensor contacts (no tools are needed). If the Rain Sensor is not used, the jumper must remain inserted, otherwise the timer will only run manual irrigation programmes and not any automatic irrigation programmes.
Install the RF Rain Sensor Interface (cod. 8480), routing the wire antenna through the relative clips.
Clean the filter at the end of each season and check it regularly.
Turn off the water tap. Loosen the 3/4" screw collar of the tap connector, turning clockwise.
Remove the filter.
Rinse the filter clean under running water. After washing, reassemble all parts as before.
At the end of the season, before the winter frosts, disconnect the timer from the tap.
Remove the batteries
Store the timer in a sheltered place, away from damp, where the temperature does not fall below 3°C.