All lines
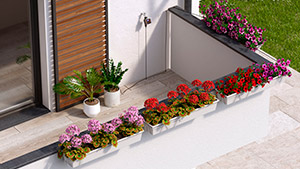
Above-ground
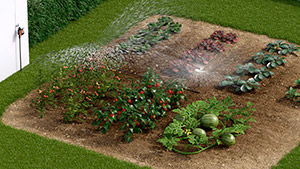
Drip irrigation

Underground
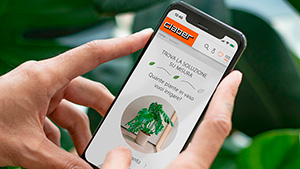
Online catalogue
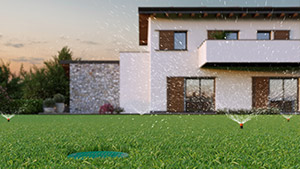
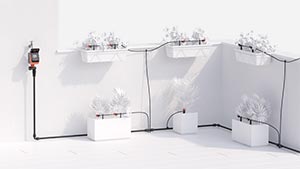
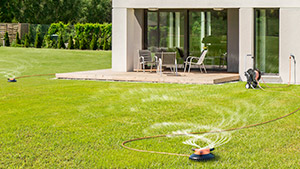
Hydro4 is suitable for gardens up to 600 m².
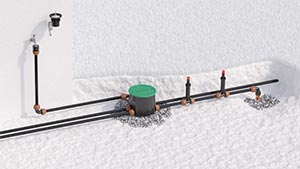
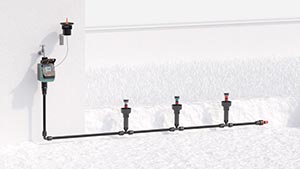
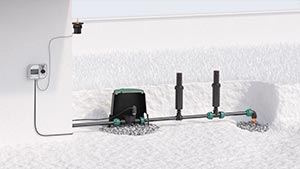
The valve box must be installed outdoors, either buried at ground level (12) or placed on a paved surface (3). In case of buried installation, place draining material and a protective sheet at the bottom before positioning Hydro4, so that soil and debris do not enter the product.
Remove the protective sheet and the line end caps only after completing the installation. Avoid areas subject to heavy or continuous foot traffic or the passage of mechanical equipment (e.g., lawn tractors). Use only filtered water. Line flow rate: at 2.5 bar → 25 l/min.
1) 3/4'' male inlet fitting
2) Valve box
3) BLUE LED automatic irrigation active; GREEN/YELLOW/ORANGE/VIOLET LED irrigation in progress; RED LED automatic irrigation not active
4) Function selection button
5) Lid fixing screw
6) Lid fixing washer and O-ring
7) Valve box lid
8) Lines 1/2/3/4: 3/4'' male threaded outlet
9) Line end cap gasket
10) Line end cap
11) Transparent lid
For operation, the programmer requires two 1.5V AAA LR03 Alkaline batteries, which must be replaced at the beginning of each season. Use appropriate recycling containers for exhausted batteries.
To insert or replace the batteries, proceed as follows:
• Unscrew the two screws on the valve box lid (1), remove them (2) and lift the lid (3).
• Unscrew the plastic cover that protects the programmer (4) and lift it (5).
• Remove the programmer (6).
• Unscrew the battery compartment cap (7), remove the battery holder (8), and remove exhausted batteries if present.
• Insert new batteries, respecting the polarity (9).
• Reinsert the battery holder into its housing (10) and screw the cap back on, ensuring the sealing gasket is correctly positioned.
• After replacing the batteries (110), to ensure the product remains watertight (IP68 rating), fully tighten the transparent cover (A), ensuring the sealing gasket (B) is properly positioned. Always close the green lid tightly with screws and gaskets (14–15).
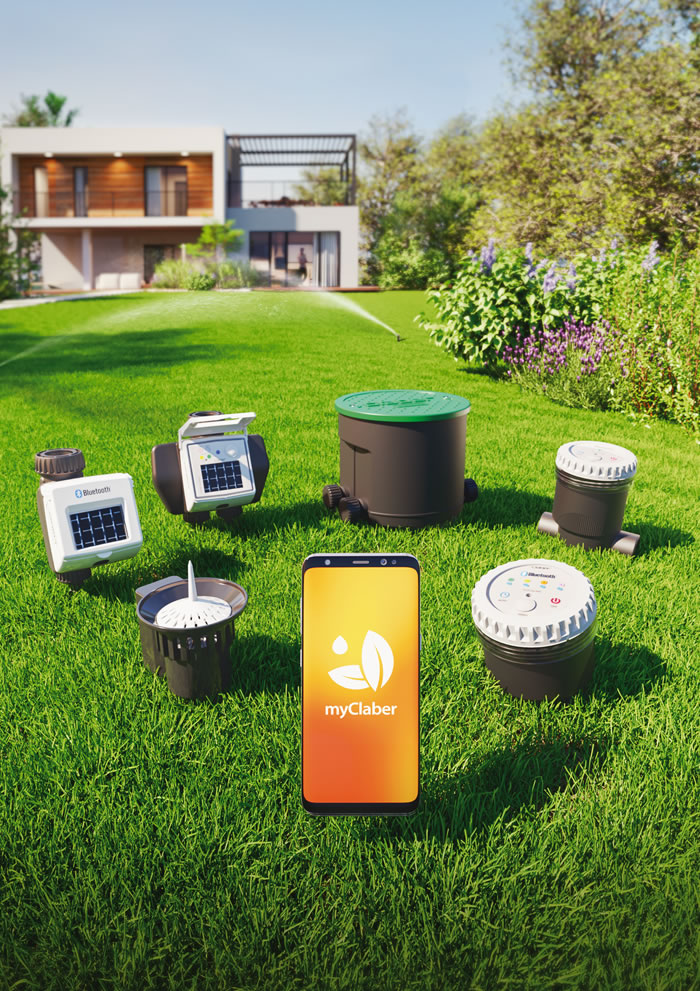
The programmer can be controlled exclusively via smartphone through the myClaber app using Bluetooth®. During communication, remain within 10 m of the device.
To start using the product, the myClaber app must be installed on your smartphone.
The myClaber app is available on Google Play® and the App Store®.
Open the myClaber app; note that Bluetooth® is required, ensure it is activated on your smartphone.
From the main app screen press “+” to add a programmer.
Enter the PIN or scan the QR code.
This information is on the back of the battery compartment of the control module; remove it to access.
Open the myClaber app; ensure Bluetooth® is enabled.
The programmer card will appear on the homepage.
Note: the app can manage up to 8 programmers and 8 rain sensors.
It is possible to connect the programmer to a Rain Sensor BT (code 90844). The sensor automatically stops the start of irrigation in case of rain.
Follow the sensor installation here#.
To check the status of the programmer, select the programmer card in the app.
On the top bar, the programmer’s status information is displayed.
The icons represent, in order: Bluetooth® signal, energy level, any Rain Sensor, and irrigation in progress.
To learn the meaning of each icon, select it to open an explanatory page.
By selecting the programmer’s card, you can view its status information through the top bar.
The Bluetooth® signal icon shows whether the programmer is reachable (blue) or not (grey); if unreachable, move closer with the smartphone.
Selecting the icon opens an explanatory page.
Bluetooth® signal quality.
If the programmer is unreachable, move closer with your smartphone.
If the issue persists and during PAIRING the PIN was entered manually instead of scanning the QR code, an incorrect code may have been used. Delete the programmer and repeat PAIRING.
The energy level, visible on the programmer’s page in the app, is particularly important.
The energy level also appears in the top bar after opening the programmer page. Selecting the energy icon provides additional information.
If the energy level is insufficient, replace the batteries as soon as possible. There are 5 energy levels. If the level enters power saving mode (yellow icon), the programmer will still ensure automatic irrigation for at least 1 day. With insufficient energy (red icon), all functions are disabled while date and time remain stored for about 16 hours before shutdown.
If the programmer fully discharges and turns off, it may restart once the batteries are replaced. In this case, date and time settings will be lost and irrigations may start unexpectedly.
By selecting the programmer’s card, you can view its status information through the top bar.
The rain sensor status can be viewed on the top bar using the umbrella icon.
The sensor sends its status to the programmer at one-minute intervals.
A blue umbrella icon indicates that the rain sensor is full and automatic irrigations will not occur.
A grey icon means the sensor is empty and automatic irrigations will proceed as scheduled.
By selecting the programmer’s card, you can view its status information through the top bar.
The irrigation status can be viewed on the top bar.
If irrigation is in progress—automatic or manual—it is shown with a drop icon: blue if irrigation is active, grey if not.
To enable or disable automatic irrigation for a programmer, tap its product card.
Use the Automatic Irrigation switch. If automatic irrigation is disabled, a red icon will appear on the programmer image.
Alternatively, you can use the button on the programmer. Press once to display its status.
A blue LED flash indicates automatic irrigation is active; a red flash indicates it is inactive.
Pressing the button twice switches the state: active → inactive or inactive → active.
By tapping the programmer card, you can begin its programming.
Hydro4 BT offers 2 irrigation programs, A and B. Each program can open irrigation lines sequentially or only some of them. Select the desired one.
Set the IRRIGATION DURATION for each line for both program A and program B.
Rotate the hour and minute digits until reaching the desired start time for the line and confirm.
The irrigation duration for each line can be set from 1 minute to 2 hours.
Activate the IRRIGATION START time.
Up to 4 start times per day can be set for each program.Attention:
programs cannot overlap; only one valve can be opened at a time.
Rotate the hour and minute digits until reaching the desired irrigation start time and confirm.
Alternatively, use the keyboard icon to enter hours and minutes directly.
Then select the days of the week on which irrigation should occur. Irrigation will take place on the days highlighted in orange.
If necessary, you can set a BUDGET to increase or decrease irrigation durations, from –50% to +150%, without modifying the program.
Drag the slider to increase or decrease the budget value, or use the “+” and “–” buttons, then confirm the new value.
To confirm the settings, press Save.Attention:
programs cannot overlap; only one valve can be opened at a time.
To activate the program immediately, make sure the program switch is set to ACTIVE.
To ensure scheduled irrigations occur, make sure the automatic irrigation switch is also set to ACTIVE.
From the programmer screen, select the program you want to modify.
Change the desired settings.
To apply the changes, press Save.
It is possible to manually open and close the irrigation lines for a specific period of time.
Press the programmer card.
Select the Manual Irrigation option.
Select the desired irrigation line and set the irrigation duration by tapping the hour/minute field.
Rotate the minute digits to reach the desired duration and confirm.
Irrigation can be set from 1 minute to 4 hours.
To start irrigation, press START.
It is possible to stop manual irrigation before completion by pressing STOP.
If the manual irrigation is completed, the programmer returns to automatic irrigation mode. If an automatic irrigation is scheduled during a manual one, it will not occur.
A single program can also be manually activated. This function starts the full A or B program cycle, opening the valves in sequence according to the settings.
It is possible to stop manual irrigation before the end of the cycle by pressing STOP.
To activate manual irrigation from the programmer, press the Hydro4 BT button several times until the LED flashes the color of the line to open: line 1 GREEN, line 2 YELLOW, line 3 ORANGE, line 4 PURPLE.
A 15-minute manual irrigation will start on the selected line.
To stop irrigation before completion, press the programmer button again.
If manual irrigation finishes, the programmer returns to automatic irrigation mode. If an automatic irrigation is scheduled during a manual one, it will not occur.
With the myClaber app it is possible to assign a name to the programmer or to its irrigation lines.
Select the rename action.
To assign a name to the programmer or to the irrigation line, select the text box you want to edit.
Type the text (maximum 20 characters) and confirm.
With the myClaber app it is possible to delete an associated programmer.
Select the Delete action.
Confirm the deletion.
The programmer will no longer appear in the myClaber app. To associate it again, repeat the ASSOCIATION procedure.Attention:
a programmer deleted from the app continues to carry out its programmed automatic irrigations, but will no longer appear on the main screen of the app. To only suspend programmed irrigation, use the Automatic Irrigation switch.
With the myClaber app it is possible to update the programmer’s software (firmware).
When available, an UPDATE AVAILABLE message will appear.
Press the button to proceed.
Confirm the message to start the update.
During the process, make sure you are close to the programmer and do not close the app until the update is complete.
During winter periods and inactivity, close the tap (1) or upstream shut-off valve and access the control module (23).
To drain residual water, manually open all 4 lines in sequence to discharge the water (4).
Remove the programmer (456) and store it in a dry place where the temperature does not fall below 3°C, and remove the batteries (7).
Close both covers properly, the transparent one and the green one, ensuring screws and seals are correctly positioned.
The programmer can be used with the Claber Rain Sensor Bluetooth® (code 90844).
The Rain Sensor communicates its status to the programmer: if the container is full (rainfall of at least 5 mm), irrigation will not start and any irrigation in progress will stop within 1 minute. Manual valve opening, both via button and app, remains enabled even when the Rain Sensor is active.
Access the battery compartment.
Unlock and remove the bottom cover using the side latch.
Use only two new, non-rechargeable 1.5V AA (LR6) alkaline batteries.
When the LED flashes red, the batteries are running low: replace them as soon as possible.
Dispose of exhausted batteries in the appropriate recycling containers.
It is recommended to remove the batteries during long periods of inactivity of the Rain Sensor BT.
Access the battery compartment and locate the label with information on the back.
Enter the numeric code (PIN) or scan the QR code on the label.
The Rain Sensor BT card will appear on the main page of the app.
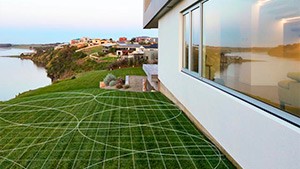
For installation, ensure that the chosen position allows the rain sensor to communicate with all devices to be controlled; each Rain Sensor can communicate with up to 8 programmers.
Maximum range is 10 m without obstacles (see Rain Sensor instruction sheet).
If a single sensor cannot cover all programmers, installing more than one is recommended.
Start the scan to search for programmers available near the Rain Sensor.
Check that the Bluetooth® signal quality is sufficient (min. 2 bars).
Pair the Rain Sensor with one or more programmers installed in the app.
After pairing the programmer, it is necessary to save the changes.
The rain sensor status can be viewed by selecting the programmer card in the app.
The rain sensor status can be displayed in the top bar with the umbrella icon.
The sensor communicates its status to the programmer every minute.
A grey umbrella symbol means the rain sensor is empty and automatic irrigation will proceed as programmed.
A blue umbrella symbol means the sensor is full (rainfall of at least 5 mm/m²) and it sends a stop signal to all associated programmers via the myClaber App.
When the water evaporates, the Rain Sensor will send a signal to resume irrigation.
App Store is a registered trademark of Apple Inc.
Android, Google Play and the Google Play logo are registered trademarks of Google LLC.
The Bluetooth® word mark and logos are registered trademarks of Bluetooth SIG, Inc., used under license.
Claber S.P.A. claims no rights over the third-party trademarks listed.