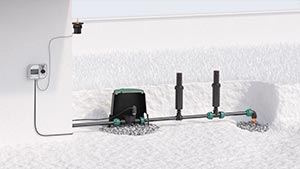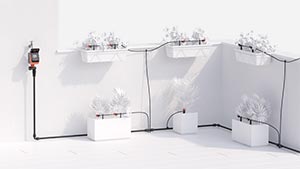
All lines
Above-ground

Drip irrigation

Underground

Online catalogue
The Rain Sensor avoids wasting water by suspending sprinkler start-up in the event of rain.
Install the Rain Sensor in a position exposed to rainfall and out of sprinkler jets.
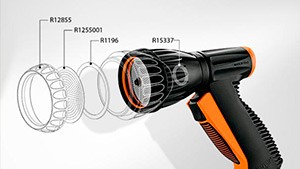
1) Top cover
2) Internal floater
3) Container
4) Fastening bracket
5) Bracket fastening screws
In order for the sensor to operate correctly, position the floater inside the container with the special fins facing upwards and the orange base facing downwards. The top cover must be kept closed to prevent any foliage or impurities from entering the sensor which would compromise the Rain Sensor operation.
When the Rain Sensor container is full (at least 5 mm of rainfall), it sends a stop signal to the timer. Depending on the model, the timer stops the irrigation cycle in progress or the next cycles as programmed.
The sensor has three wires. Inside the sensor, these are connected to a changeover contact A (one contact is normally closed N.C. and the other is normally open N.A.) which is activated when there is 5 mm of rainfall.
The rainwater collected in the container lifts the internal float. When it reaches 5 mm of rainfall, a changeover contact is activated.
The normally open contact (N.A.) connected to one of the Meteolab or Meteopragma sensor inputs sends information about the rainfall conditions. Connect the N.A. contact (common + N.A. brown wire and green wire) to a Meteolab (or Meteopragma) sensor input.
The normally closed contact (N.C.) can be used to disconnect the electrical control circuit between Meteocometa, Aqua-Home 4-6-8 or Multipla. When it is sunny again, the water evaporates and the float drops down. Disconnect the solenoid-valve common wire connection and connect the 2 ends to the N.C. contact (common + N.C. brown wire and white wire).
When it is sunny again, the water evaporates and the float drops down. The timer restores the irrigation programme set by the user.